The Dell Latitude E5430v Bluetooth Module is installed/replaced in the following steps.
Flip it over.
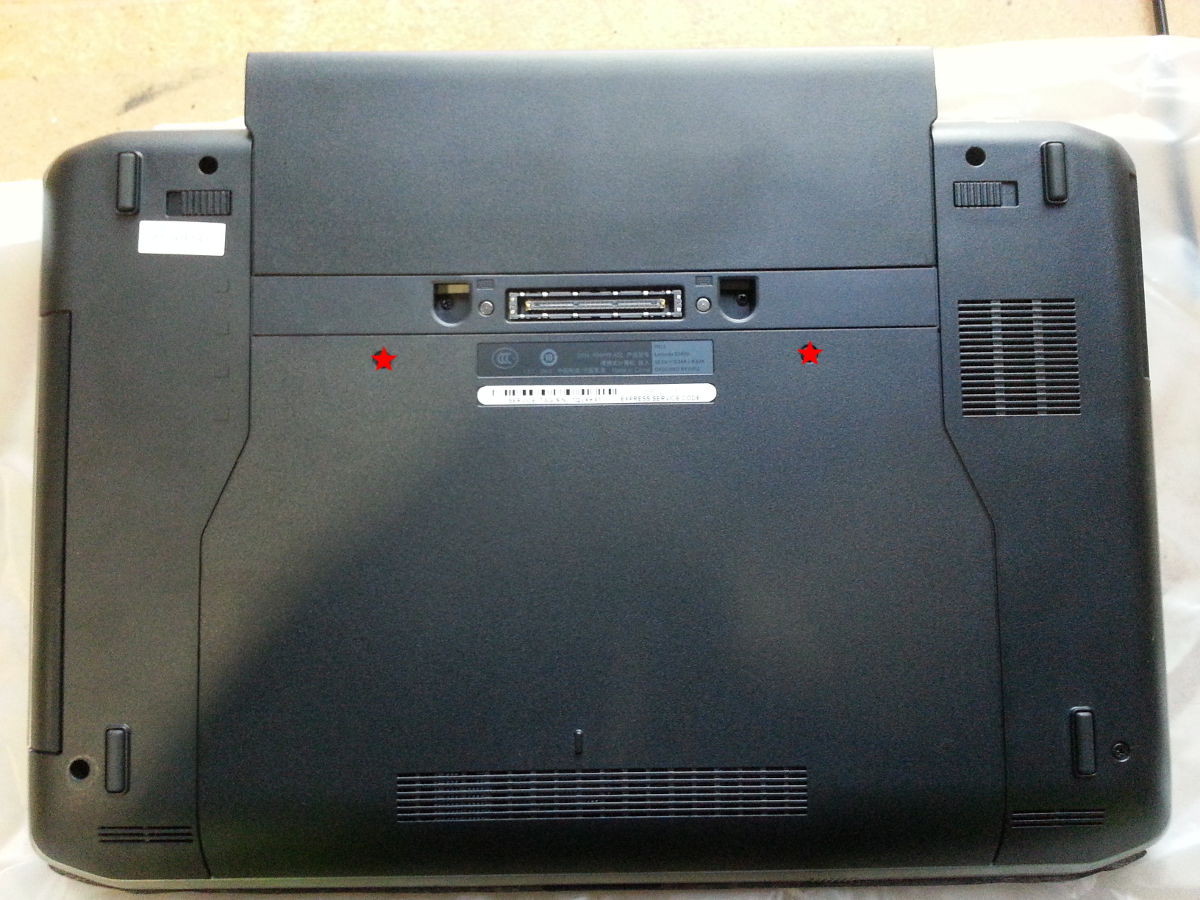
Remove the battery.
Remove the two screws from the main back panel and slide the panel to remove it. Then remove the screws from the postions marked below. Lift and jiggle at the arrows and remove the cover. Slide out the DVD drive.
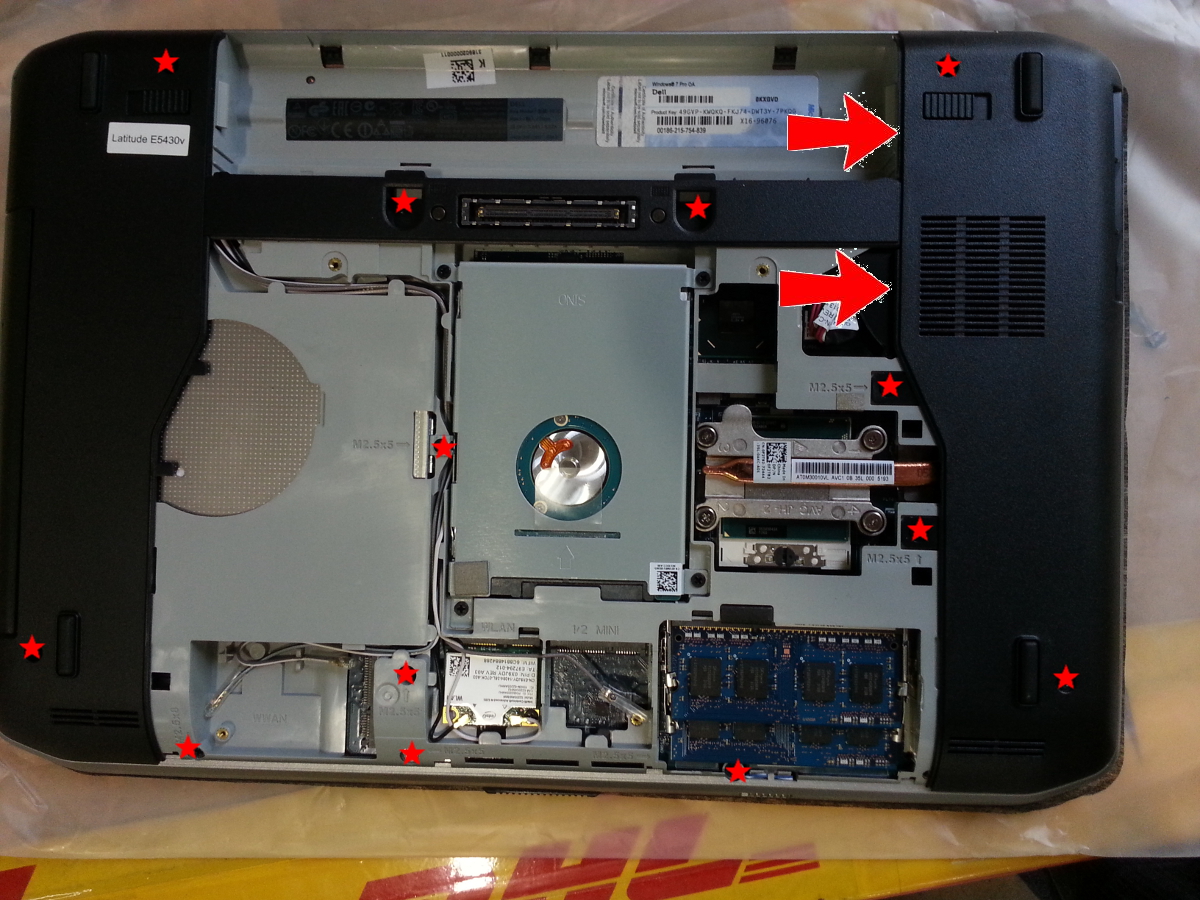
Remove the additional screws now visible (below).
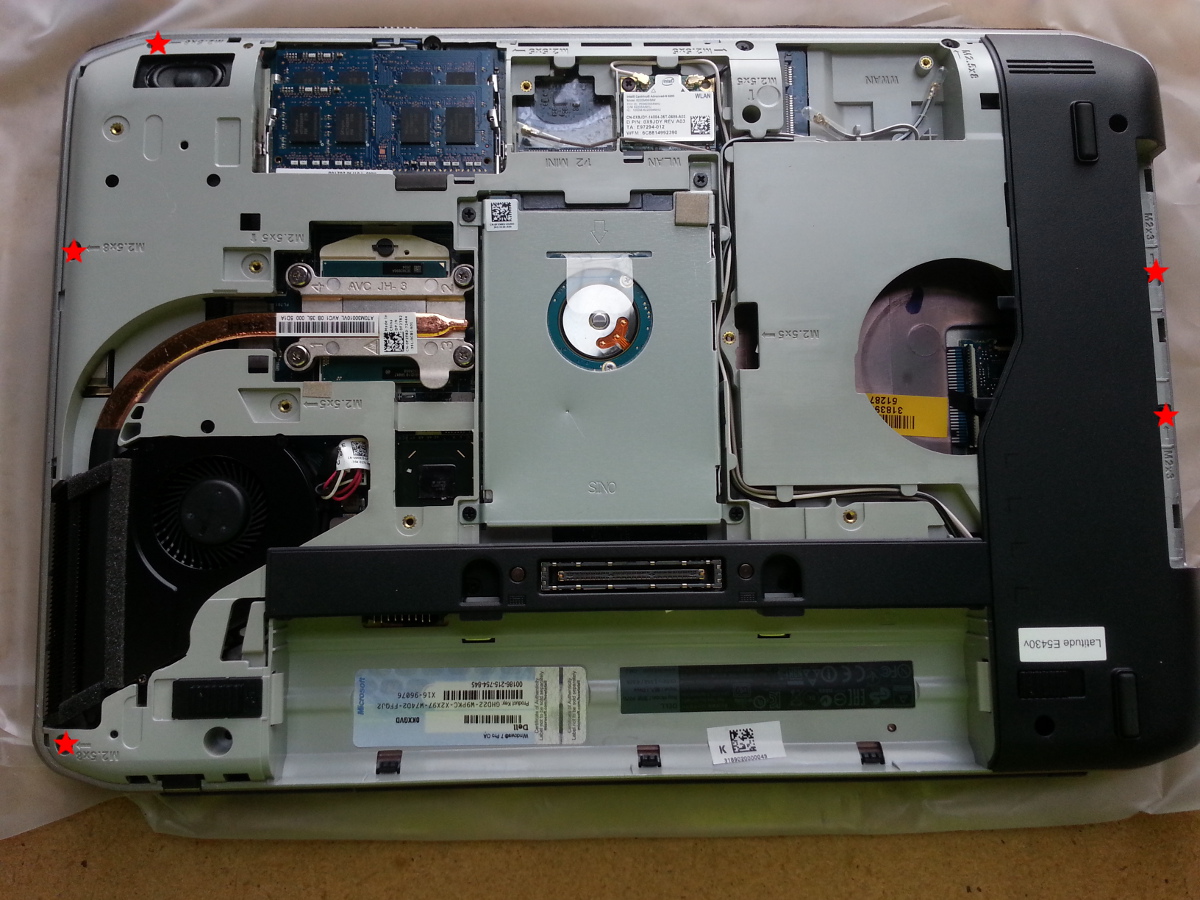
Flip it over again. (notice the screws laid out in the same pattern as they were removed - none lost and none left over)
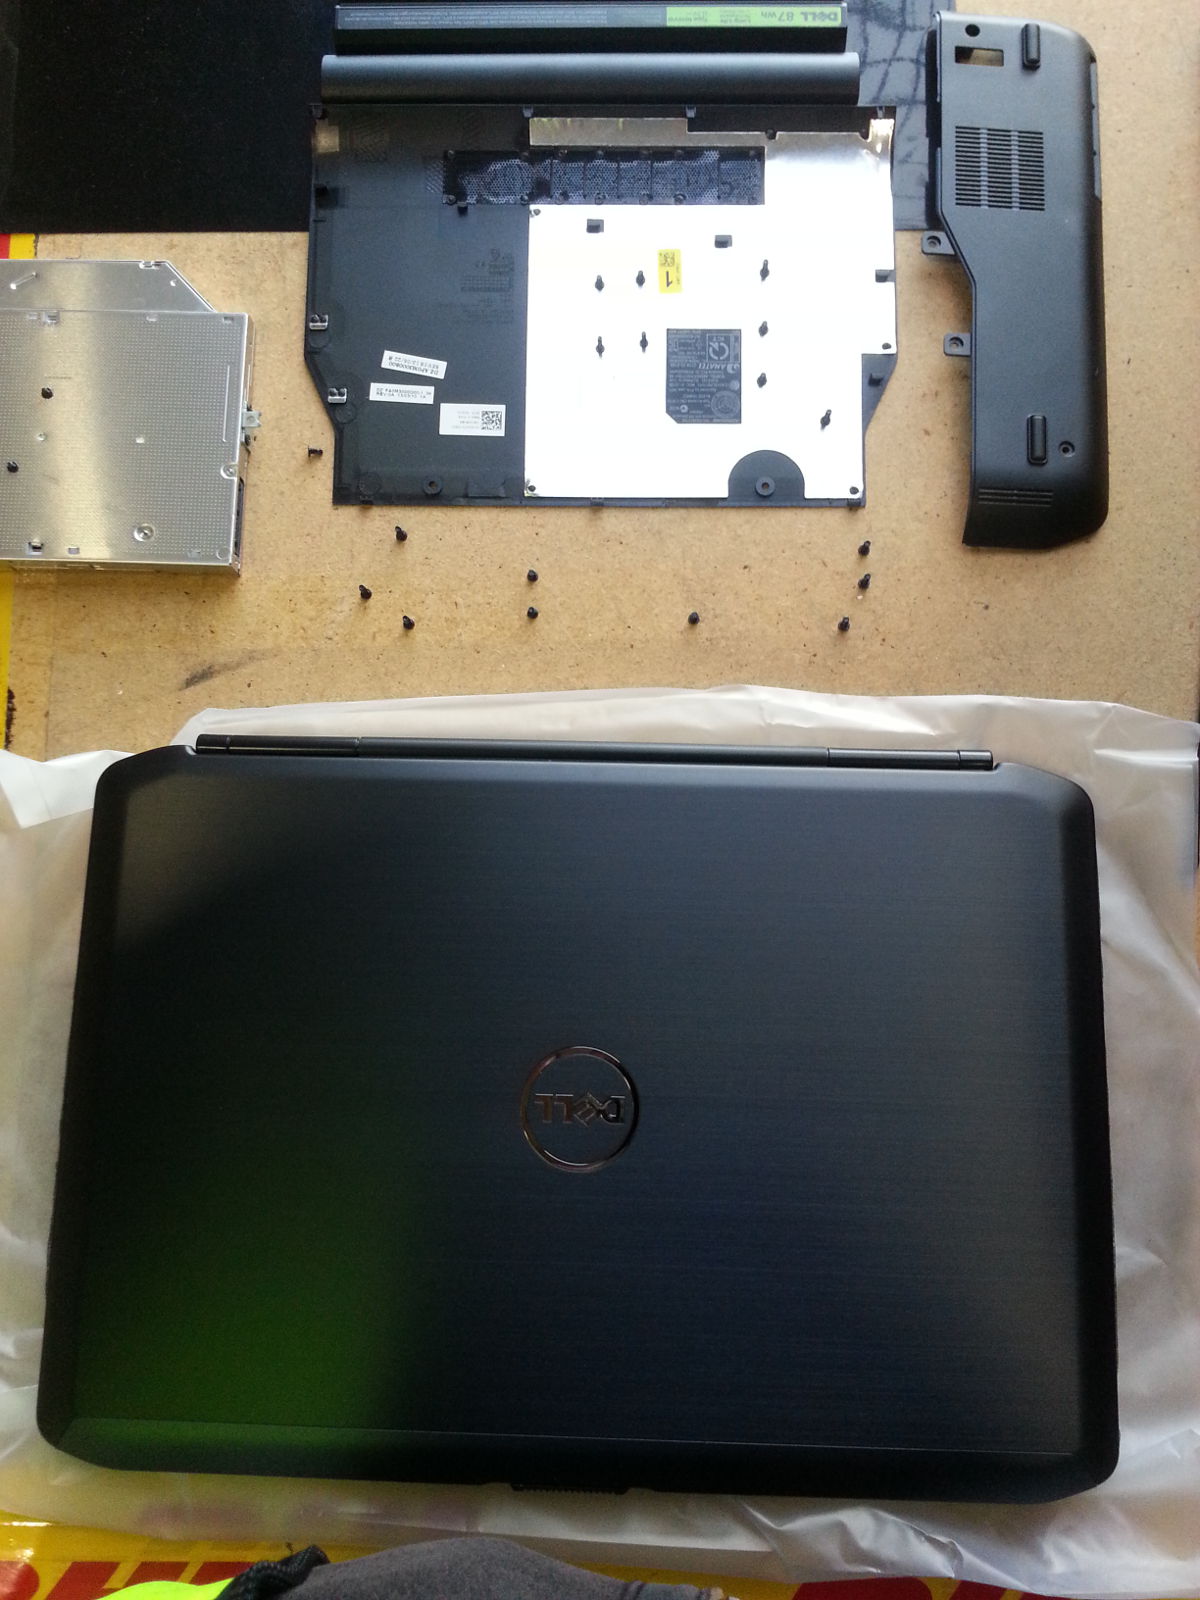
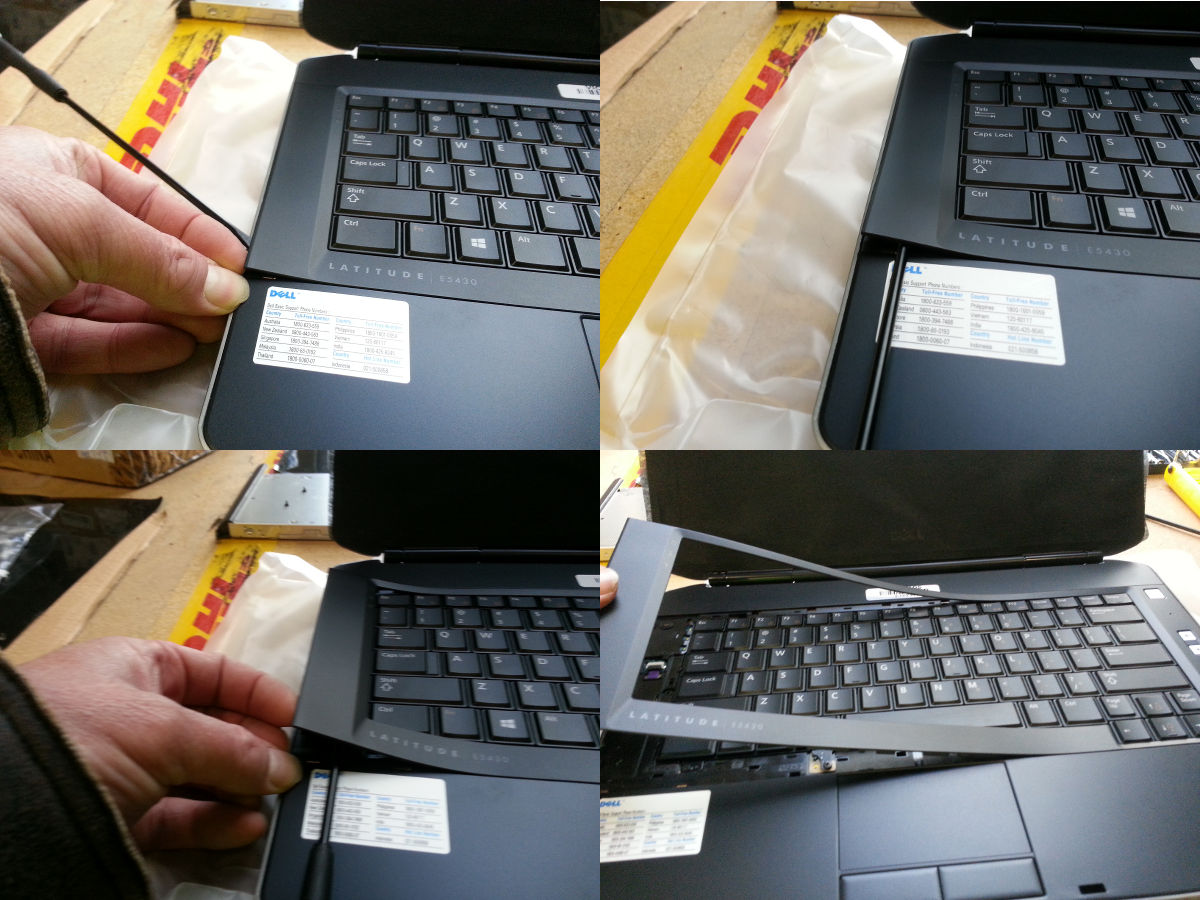
Lift the edge of the keyboard surround carefully and get a small screwdriver under just enough to raise the front edge, taking care not to bear on visible edges or surfaces.
Once high enough to edge the screwdiver in through the front... edge it in through the front...
Within reason you can lift safely here as the only thing that can be damaged is the ribbon connector which is just over half way up under the cover.
After it starts to come away, it can release quite easily with a wiggle on the way up.
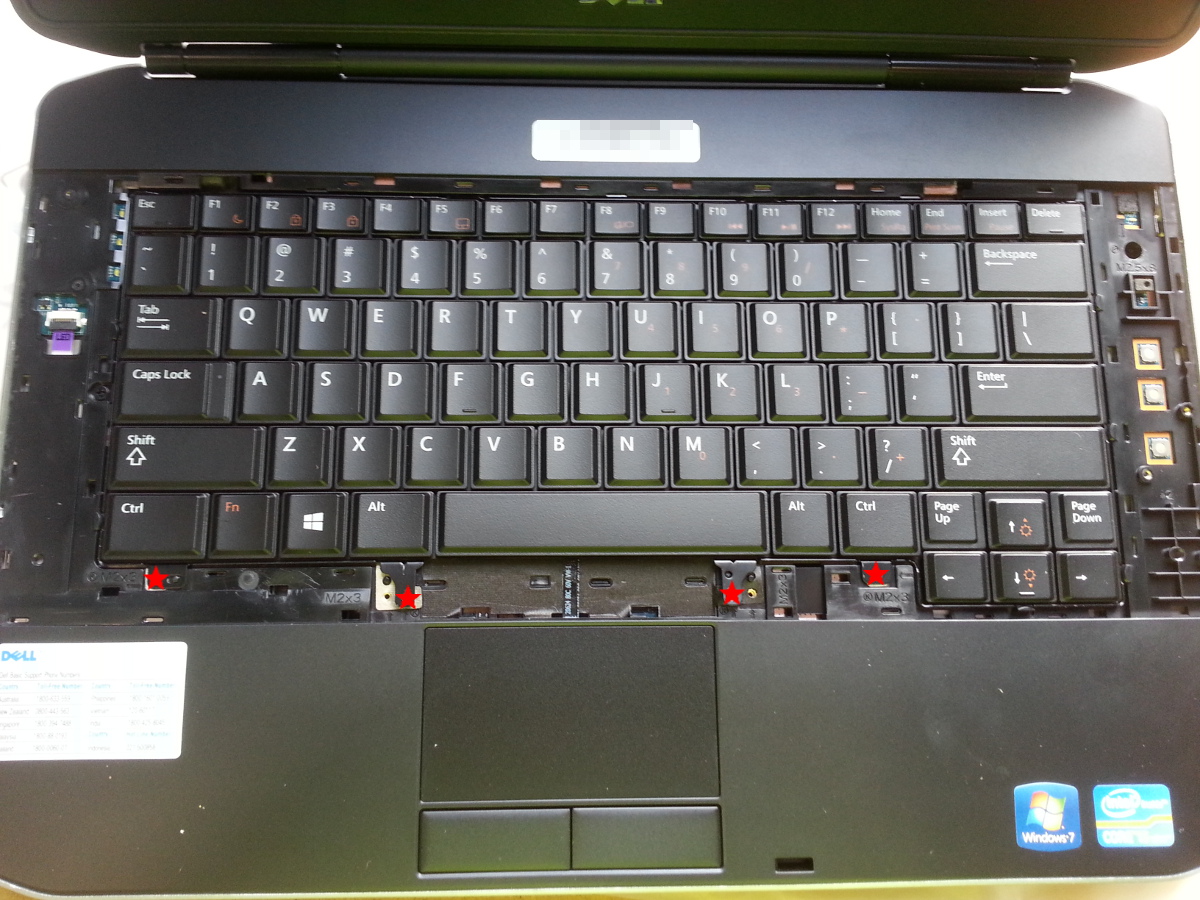
Remove the four remaining screws screws holding the keyboard in.
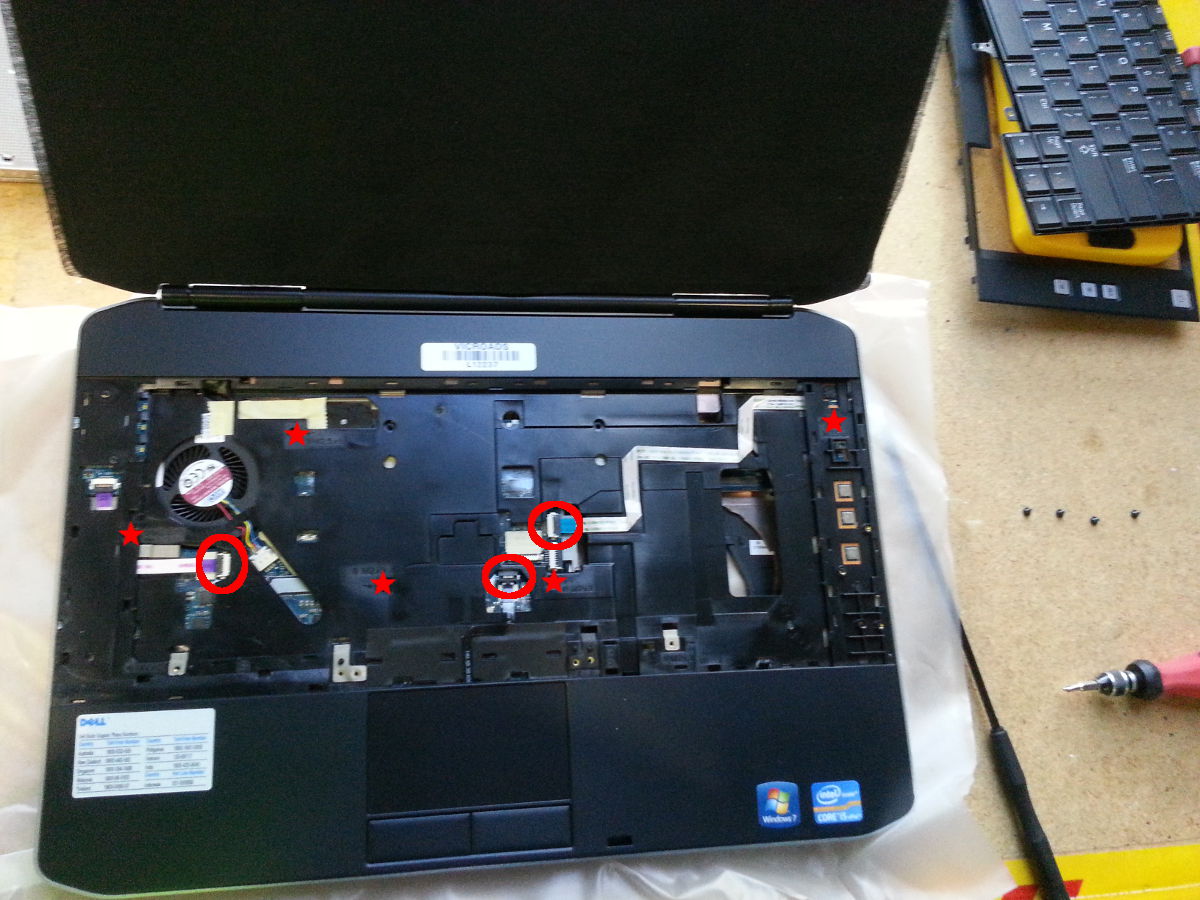
Remove the final five screws and unlock the three ribbon connectors and free the ribbons.
more here soon.
Assemble the bluetooth module and cable. You'll feel the slightest click as it goes into place (most times:).
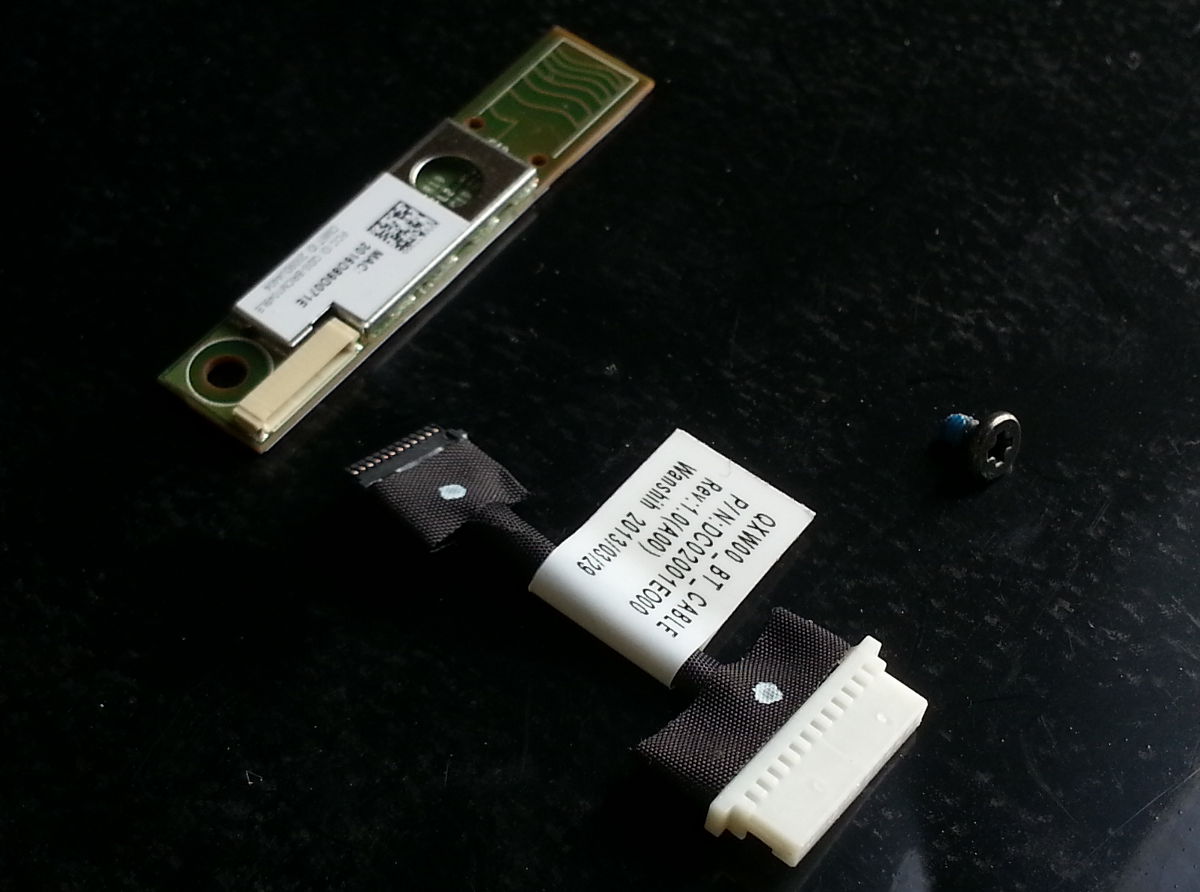
A very slight clicking into place can usually be felt when pressing the bluetooth module cable into the motherboard too. Screw the scre down until the module doesnt move, not just until you feel some resistance from the locktite on the new screw.
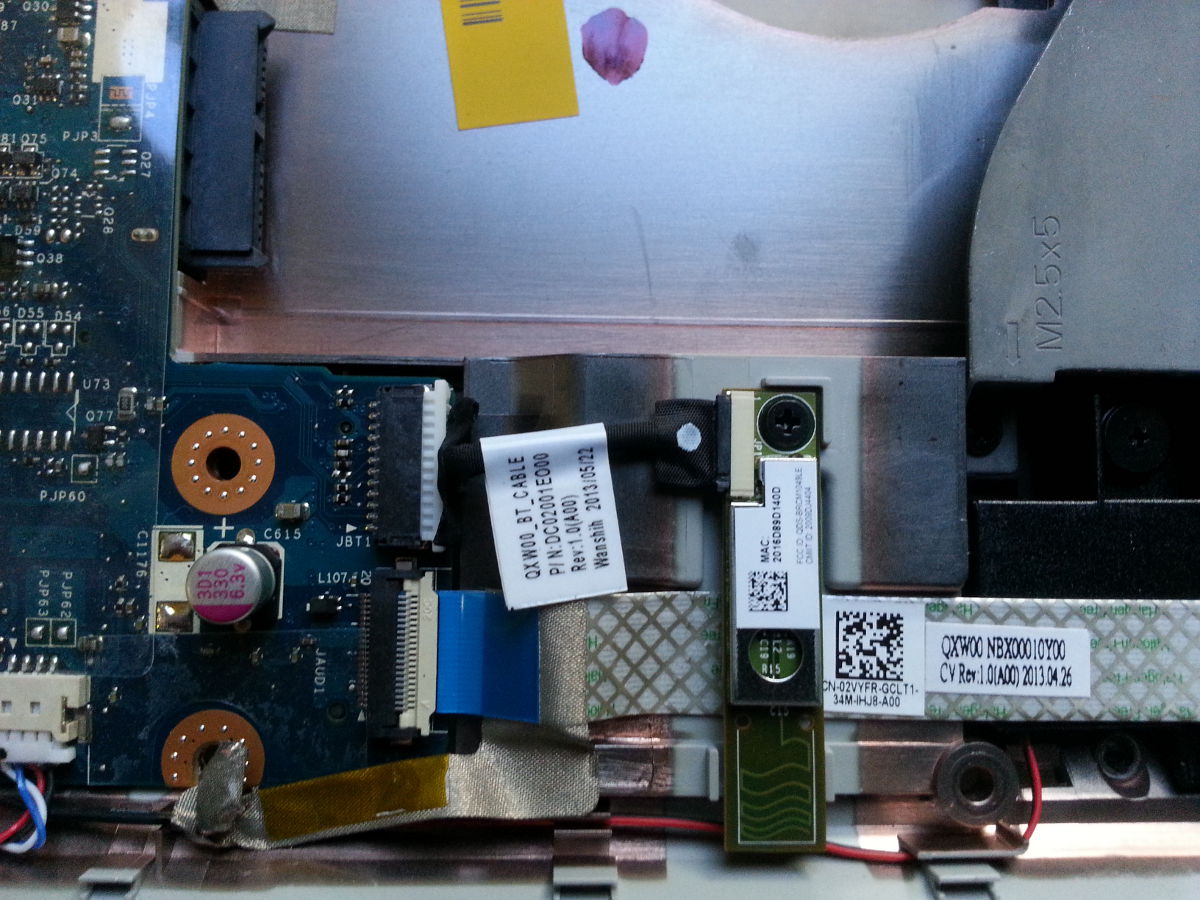
Reverse procedure. (but don't take the bluetooth module out!:)
]]>Some reasons and cures as to why your website is showing 'garbage' characters instead of the foreign language you hoped to see. By garbage we mean question marks '?' or the like displaying where you hoped to see an accent or distinctive character from the language in use.
There are two distinct places that the characters that hit your visible website come from.
- First one being the page’s source document. In other words the xxx.html, xxx.php xxx.asp etc encoded pages that help render you site on someone's browser.
- The second may be from a database that sits behind your website and stores a variety of content and settings. This database may be a custom designed one that your web developer built for your site. Alternatively, it may be the database of a Content Management System (CMS) such as Joomla! or the like.
Page's source document correction.
Let’s address the possibility of the first source first... It seems natural to do so... directly encoding the characters in the page’s source document.
While coding your page in English doesn’t seem to present any issues, the first time you try to use the Vietnamese ‘Đ’, for example, you end up with ‘?’, or a question mark in a diamond, or something else unexpected.
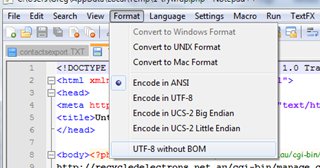
In a nutshell, the document needs to be encoded as ‘UTF8 without BOM’. If you’re into why the watch works follow the link, otherwise, if you only want to set the correct time read on. To set this encoding, you need a text editor other than Notepad or WordPad that let you control the encoding. Some that work well and are freeware are Notepad++, TopGun and BablePad.
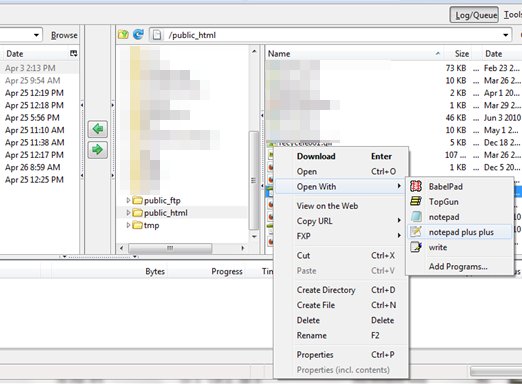
The easiest way is to open the file at the source, change the encoding and save it back directly. A no fuss way to do this is to use FireFTP in Firefox, as it allows you to open, edit and save a file directly from your website’s file structure. You’ll need to set Notepad++ as one of the “open with...” options for html, htm, php etc type files.
So, the no fuss way to fix this particular issue after arming yourself with the tools mentioned
- Browse to your source document on your website using FireFTP
- Right click the file in question
- {tooltip}Select Open with...{end-texte}
 {end-tooltip}
 - Choose Notepad++
- Choose Format... {tooltip}UTF8 without BOM{end-texte}
 {end-tooltip}
 - And if your site is hosted on a unix system, just to cover the bases choose Format... convert to UNIX format.
- Edit your special characters as you tried before you knew you had this problem
- You should then be able to save the document.
- Browse to the page and refresh.
- Say thank you Recycler.
Database colation selection.
After determining that the characters that you are trying to output are actually coming from the CMS database, you'll need to take the following (or similar) steps. We will work throught the process assuming that you have Joomla! on a MySQL database and access to {tooltip}phpMyAdmin{end-texte}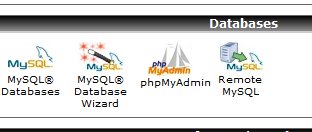 {end-tooltip} for manipulating it.
The first thing you need to do with phpMyAdmin is to determine {tooltip}which database it is to be fixed,{end-texte}a clue for joomla... look in configuration.php{end-tooltip} if you have more than one. If you cannot identify which database it is you need to stop now and call a friend who may be a little more geekier than yourself.
- Find your{tooltip} database {end-texte}
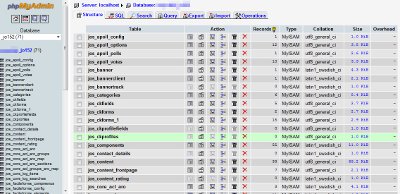 {end-tooltip}on the left frame, and click it. The database information should come up on the right, and the left frame should change to a list of tables.
 - Click 'Operations' - the right most tab on the right hand pane.
- Down the bottom of the right pane you will now see Collation and a drop down list with it. Choose 'utf8_general_ci' and then 'Go'.
- Step 4 is remember that step 3 will only take effect on new tables created from this time forward. Next steps will help with existing tables.
- Continuing with the Joomla!example, click the 'content' table on the left. Now the table's information will appear on the right with a list of the fields. If you don't see that then click the 'Structure' tab on the right.
- Click the{tooltip} 'Check All'{end-texte}
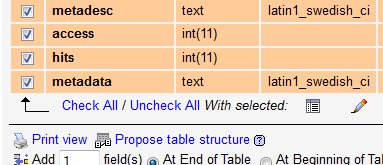 {end-tooltip} under the list of fields, and all the fields should now be selected.
 - Click the 'Pencil' icon, to the right of `With Selected`.
- You will now be presented with a form which allows you to modify the selected fields. What you're interested in is the 'Collation' row. Change each collation to utf8_general_ci (only for those with an existing collation already). Press save to lock away your changes.
- Repeat 5-8 for each of the tables you think may be causing your issue.
- Edit your articles using the new characters (ăâêôđĐàảãáạa etc).
- thank the Recycler for this article.

Accessing the Fuji Xerox MFD web interface
Too many usernames and passwords in your head too...
Don't bother remembering this one, just remember where to find it... here!
The Fuji Xerox MFD defailt administrator username and password:
username = "11111"
password = "x-admin"
(careful... username looks like a password and password looks more like a username[btw, username is the default walkup password])
]]>