Email on the iPhone
Setting up your email on the iPhone
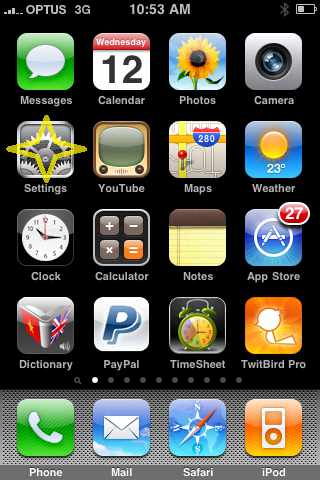
First choose "settings"
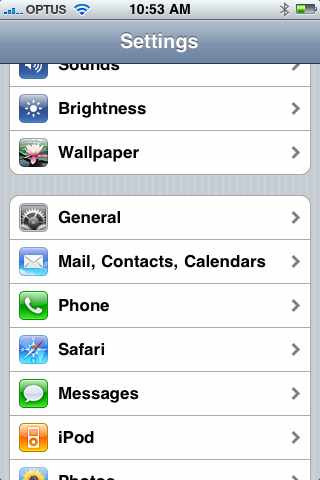
...then "Mail, Contacts, Calendars...
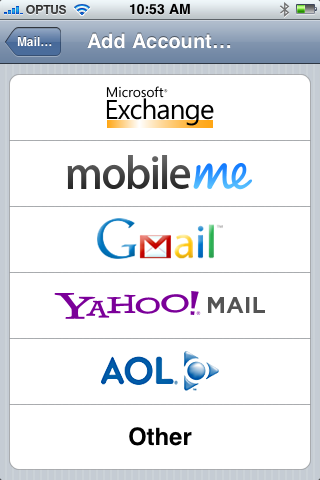
When in the accounts area, choose "Add Account"...
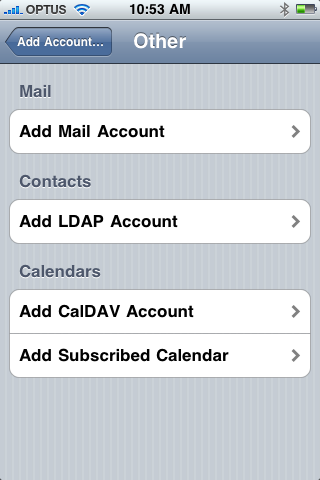
...then choose "Other" from the following list...
...then "Add Mail Account" (derrr)...
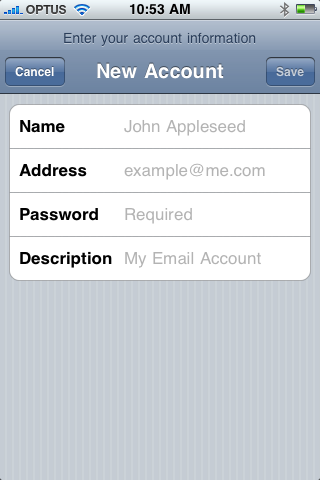
...enter your account information...
(the examples given are good)
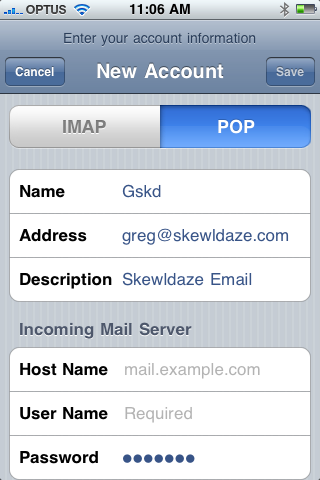
...be sure to choose "POP" as the account type...
if you choose IMAP it will still work on your account, but, your iPhone data charges
will go through the roof and it will chew away at your hosting accounts bandwidth...
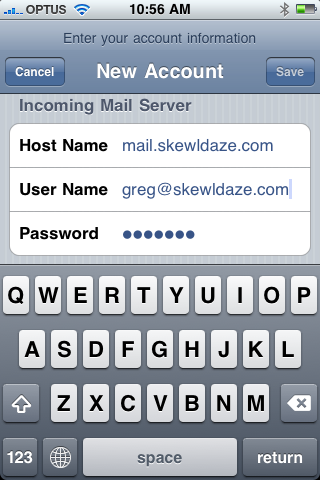
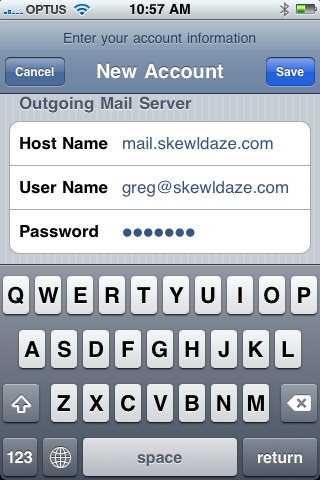
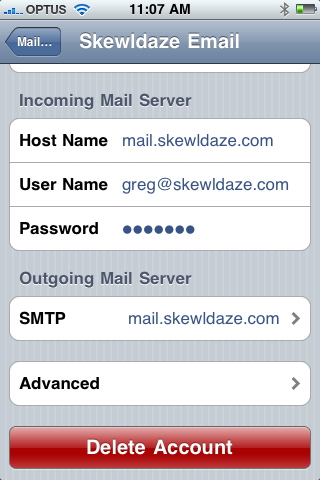
...next you need to enter the incoming mail server details...
this will be mail.yourdomain.com.au where yourdomain .com.au is your actual domain name
and the mail. part in the front tells it to ask the mail server...
Your username is your email address...
and the password is whatever it is for your email address...
[the simplified detail is only here for those who need it!!]
...then enter exactly the same into the outgoing mail server fields...
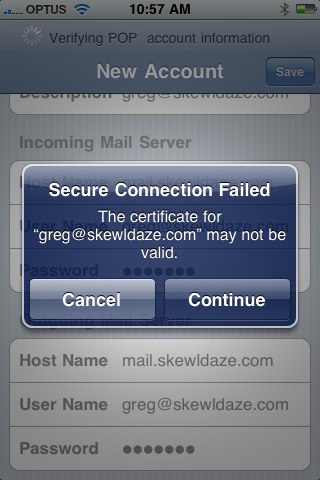
...tap save, and the iPhone will start checking a few things...
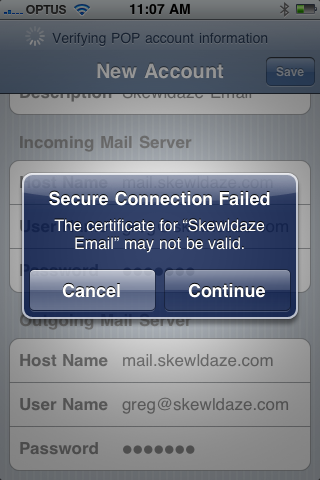
If you haven't spent lots of dollars on a certificate it may protest a little...
but hey,.. this is your email account... tap the "Continue" button...
...it may complain more than once... tap "Continue"...
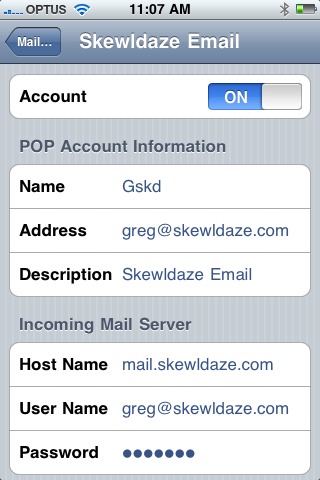
...eventually... you account is set... Yay!!..
...at this point you can send and receive emails...
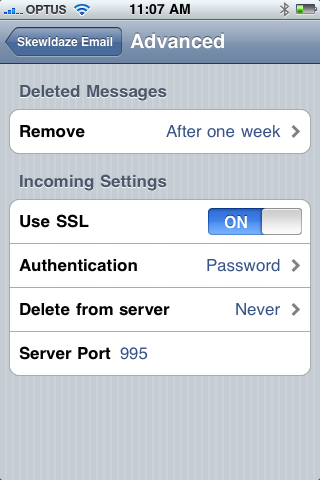
...you can then fiddle with some of the settings if you choose...
if you use a desktop email client, the same settings can be used...
(it just looks different on screen, but they are the same questions)
you may wish to set your desktop mail client to manually send and receive...
this will allow all your mail to hit the iPhone before it is permanently removed by your desktop client...
or...
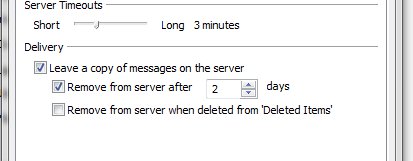
leaving a copy on the server for a couple of days will give the phone
a chance to get a copy too...


Comments
thanks
the manual send/receive for outlook is a good idea too. thanks again
RSS feed for comments to this post